Your Cart is Empty


Classic Originals Real Wood Easy Install 6" Sample - Almond
$3.00/Box
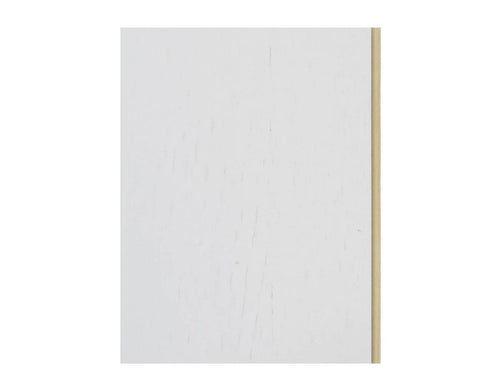


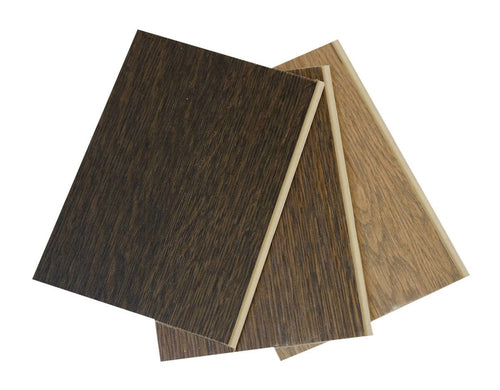


Almond can have a significant color variation from board to board. Variation of color may not show on every sample. We recommend ordering more than one sample to compare.
*Wood is a product of nature. Variation of grain, texture and wood character may not show on every sample.
| Color | Almond |
| SKU | WSC-ORAM |
| Sample Size | 5.1" x 6" |
| Construction | HDF Core with Real Hardwood Veneer |
| Profile | Overlapping shiplap on long sides of each board |
| Wood Finish Texture | Wire brushed |
| Wood Type | High-Density Wood Fiber Board (HDF) made with 100% recycled forest content. |
| Protective Coating | WearMax® DWR |
| Resistance Type | Scratch, Stain, Water, Fade, UV |
| Fire Resistant | Class C-ASTM E-84/ Class A optional (please inquire) |
Have a question? Call Us
You may also like
FAQs
-
No, our White Cape Shiplap Wallplanks are currently not paintable. In the past, the White Cape Shiplap Wallplanks were made out of vinyl, which allowed them to be painted. However, we switched from vinyl shiplap over to paper-front shiplap.If the paper-front shiplap is painted, it will cause bubbling. Therefore, our White Cape Shiplap made using paper-front cannot be painted.
-
1. The Classic Shiplap has a bright, clean, white vinyl wrapped face on an HDF core. These planks are 7.44" W and have the true nickle gap shiplap profile. Both options are peel and stick with our pre-applied adhesive.
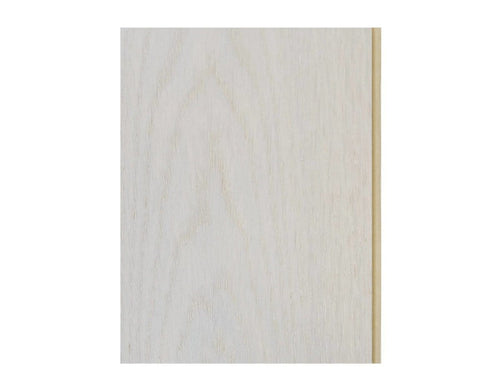
2. The Alabaster Originals has an engineered hardwood veneer on an HDF core. You will see the natural grain of the wood behind the white face. These planks are 5.1" W and have an interlocking joint profile.
-
You can use code 3FREESAMPLESto get up to 3 samples for free! We just ask that you pay for shipping!
-
You can purchase individual full boards here on our website: https://www.wallplanks.com/collections/individual-full-boards
-
Take the base of your wall times the height of your wall to get total square feet.
-
Measure the length of the base of the triangle and the height of the triangle. To calculate the area of the triangle use the formula: (base x height) / 2. Multiply the base by the height and then divide it by 2.
-
"The Alabaster Originals has an engineered hardwood veneer on an HDF core. You will see the natural grain of the wood behind the white face. These planks are 5.1"" W and have an interlocking joint profile. The Classic Shiplap has a bright, clean, white vinyl wrapped face on an HDF core. These planks are 7.44"" W and have the true nickle gap shiplap profile. Both options are peel and stick with our pre-applied adhesive."
-
Wallplanks can adhere to any surface that is flat, clean, smooth, dry and structurally sound.
-
Wallplanks can be installed on clean ceramic tile. Waxy, wet, dusty and dirty surfaces are the only surfaces that would cause adhesion issues.
-
Wallplanks are meant to be a permanent update to your walls. If you choose to remove the planks they could leave some damage to the wall underneath and/or cause paint chipping. The damage that is caused is not substantial and can be repaired easily with skim coating or spackle.
-
To remove Wallplanks you will need a putty knife or scraping tool, a heating device such as a hair dryer or heat gun, sand paper, cloth, water and TSP.
- Step 1: Use the heating tool on high heat while using the putty knife to slowly remove the plank from the wall. The heat will soften the adhesive and the putty knife will help scrape behind it to remove it. Do not move too quickly when removing otherwise the plank may snap.
*please note that the plank may cause some damage to the underlying wall and cause the paint to chip due to the strength of the adhesive. - Step 2: Use the putty knife to remove any excessive adhesive from the wall. The heating tool may also be helpful during this step
- Step 3: Use the sand paper to smooth any damaged surface/ chipped paint
- Step 4: Clean the wall with TSP and allow to dry completely
- Step 1: Use the heating tool on high heat while using the putty knife to slowly remove the plank from the wall. The heat will soften the adhesive and the putty knife will help scrape behind it to remove it. Do not move too quickly when removing otherwise the plank may snap.
-
1. Starting with an end of row plank, remove the wall planks up to the one that needs to be replaced
2. Remove the bad plank
3. Trim off the profile of the boards before replacing
4. Use either gorilla glue or nail planks back in place
-
It is recommended that all walls be tested with a sample prior to full installation. Heavy textured walls like knockdown or popcorn walls will require a skim coat application or sanding and scraping prior to installing Wallplanks. Plywood and unfinished drywall will require a coat of basic paint primer to be applied and dried first before installing Wallplanks. All other textured walls like crows feet, orange peel, smooth or swirl will should not require additional prep work.
-
Plaster surfaces should have a minimum of one coat of primer sealer prior to installation.
-
Yes, Wallplanks can adhere to vinyl. As long as the surface is flat, clean, smooth, dry and structurally sound.
-
Yes, Wallplanks will adhere to paneling. Wallplanks will adhere to a clean, dry and structurally sound surface. It is recommended that all walls be tested with a sample prior to full installation.
-
Clean, Smooth, well-adhered wallpaper: This can be a base for Wallplanks. The installer must make sure the wallpaper is clean and firmly bonded to the wall before applying the wallplanks to the wallpaper.
Embossed wallpaper: The adhesive on the back of the wallplanks is 1/32"" thick. If the embossing on the wallpaper raises out more than that it is possible that the Wallplanks adhesion will be interrupted every time it goes over the embossing. This could result in less than a firm bond. The installer will need to test bond strength with several Wallplanks to ensure adhesive bond strength to the embossed wallpaper before proceeding with the entire installation. If bond strength is not sufficient, the wallpaper will have to be removed prior to installing the wallplanks.
Textured wallpaper: should be removed and the base wall cleaned with trisodium phosphate (TSP) before installing Wallplanks. To remove wallpaper there are steamers or wallpaper removal solutions available. These items plus the TSP cleaner are available in hardware stores or home centers. -
Yes, Wallplanks can be installed over a mirrored surface as long as the mirror is smooth, flat, structurally sound and cleaned prior to installation and a J-roller is used when applying them.
-
Follow local code. As long as the immediate surrounding of the fireplace opening is nonflammable Wallplanks can be installed on the sides of that, around and above.
-
Yes, Wallplanks make a beautiful updated kitchen back splash! They have been tested at temperatures of 140 degrees and the adhesive has stayed intact. You can see examples on the Charcoal Originals product page.
-
Yes, Wallplanks are water resistant and can be installed in a full bathroom. Additional nail down may be required.
-
No, Wallplanks should not be installed inside shower walls or right directly above the shower stall. Wallplanks are made from real engineered hardwood and are not waterproof.
-
Yes, Wallplanks can be installed on ceilings. Our Wallplanks are one of the best products you can use for wall panel ceiling applications. Wallplanks are light weight, thin and very easy to apply. Just peel and stick to the ceiling, and then use brad nails as reinforcement per the installation instructions. There is no need to hold the plank in place while trying to nail because the pre-applied adhesive eliminates that headache!
-
No, Wallplanks cannot be installed in an outdoor setting. The veneer and HDF core is made from real wood and will therefore absorb moisture. Wallplanks are only approved for indoor installations.
-
To install Wallplanks you will need a J-roller, TSP (trisodium phosphate) for cleaning sub wall, tape measure, 4' level, a straight edge, and a pencil. Possible cutting tools include a utility knife, hand saw, jig saw, circular saw, or miter saw.
-
Clean & Dry the Wall surface. Turn off power to installation area while working around wall outlets and light switches. Remove electrical cover plates, protruding nails and loose paint. Sponge wash with TSP (trisodium phosphate), available in hardware stores or home centers, to remove residues of greasy grime, mildew, chalked paint or anything that might affect the bond of the VacuuBondTM adhesive. If wall has a heavy drywall texture, it will need to be block sanded and primed so the VacuuBondTM adhesive can achieve a firm bond. Wallplanks can be installed over well bonded smooth wallpaper. Textured wallpaper should be removed and wall cleaned with TSP prior to installing wallplanks. After the wall are thoroughly cleaned, the walls also must be thoroughly dried.
-
Plywood and unfinished drywall will require a coat of basic paint primer applied and dried first before installing Wallplanks.
-
No, additional reinforcements are not required when installing Wallplanks as long as the installation instructions are followed. We have 100% confidence in the strength of our VacuuBond adhesive. If you elect to use nails as added protection when adhering your Wallplanks to the wall, any nails that come in contact with a stud would be more secure than nails that do not come in contact with a stud.
-
The length of time it takes to install Wallplanks depends on how big your wall is. A small accent wall would take no more than a few hours to complete. For larger walls, you could make a fun weekend project out of this!
-
To install Wallplanks on an uneven surface you need to trace the uneven ceiling and or floor and rip cut your Wallplanks to fit the uneven surface.
-
Measure and trace the obstruction with a straight edge and pencil on the planks before removing the paper liner from the glue. Cut the traced obstruction space on the planks using a jig, hand or scroll saw. Place the cut Wallplanks over the obstruction to ensure a proper fit. Remove the release paper and install. Don't forget to use the J-roller.
-
See our image below on how to stagger the Wallplanks. The rule of thumb is 12" minimum offset. The goal is to not repeat or line up offset lines for at least every 3-4 rows. Try to avoid having boards that are shorter than 12" in your pattern. https://tawk.link/5aabe77c4b401e45400dcb99/a/5bb3c0743835730e8e0fa8d7/553378e2cdbc20f86394ca4bbd769ee0732f558a/image.png
-
Wallplanks are not load bearing. Wall Décor like mirrors, pictures, shelves can be mounted by drilling through the Wallplanks provided the underlying wall provides sufficient support (i.e. wall studs). Use proper hardware to install any wall décor.
-
We are 100% confident in the strength of the VacuuBond adhesive and have not had any issues to date that have not been related to pre-installation sub wall preparation or failure to use a J-roller. Below is a list of a few reasons why this could be happening:
Solutions:1. Secure the planks that are releasing by using a brad nail and a bit of filler putty or a furniture marker to blend in over the nails.
2. Secure the planks using another commercially available adhesive such as Liquid Nails, or Gorilla Glue to adhere to the planks where they have been released. Make sure to apply pressure for a good amount of time so the adhesive can properly bond.
Additionally, I would like to elaborate that we are 100% confident in the strength of the VacuuBond adhesive and have not had any issues to date that have not been related to pre-installation sub wall preparation or failure to use a J-roller. Below is a list of a few reasons why this could be happening:
1. If a J-Roller was not used immediately after installing every plank on the wall, the adhesive did not get the opportunity to adhere to the sub-wall. VacuuBond adhesive is time and pressure-sensitive industrial-strength adhesive and a J-Roller is a very crucial step during the installation process.
2. If the sub-wall is not cleaned with TSP before your installation, there could but dirt, dust, grease, or grime that is making it difficult for the adhesive to adhere to the wall.
3. If the sub-wall is not completely dry before your installation, the adhesive will not adhere properly to the wall.
4. If the sub wall that you applied your Wallplanks to has a heavy texture, the planks may not adhere well. Surfaces with a heavy texture must either be sanded or skim coated and primed before installation to avoid adhesion issues. If you are installing on plywood, or unfinished drywall, those surfaces should have been primed before installation.
5. If the sub wall that you applied your Wallplanks to is not structurally sound, the adhesive may not adhere well.
6. If permanent HVAC is not maintained between 60 degrees and 75 degrees with a relative humidity between 30-55% for a minimum of 14 days before installation as well as during installation to ensure proper adhesion.
7. If there was not 1/4 “ expansion space left around the perimeter of the Wallplanks installation
8. If the Wallplanks are installed in a full bathroom and there was no additional nailing down.
-
The veneer is a thin decorative covering of fine wood applied to the front face and the back face of our environmentally friendly HDF core.
-
Classic Shiplap boards have a built-in feature called "Wall Flex" that helps each board to contour to slightly out of flat walls. The product is not designed to flex around or over architecturally contoured or curved walls.
-
"To remove excess adhesive from the Wallplank veneer simply use Goo Gone! Finishing nails should only be used for wood subwalls."
-
We offer trim that can be nailed down. You can find trim by following this link to our website: https://www.wallplanks.com/collections/trim
-
It depends on how round your corner is. If it is not too round, you can accomplish this by installing trim! What you can do is measure the corner to verify.
- 1. To measure, take a straight edge and put if flat to one of the walls so it is hanging at least 2” over the edge.
- 2. Then, take either a ruler or a tape measure and put it flat to the other wall.
- 3. Measure the distance from the end of the rounded wall to the 90-degree meeting point of the straight edge & ruler/tape measure. Please note this measurement and keep it handy. If the measurement is less than 1.25” then you should be able to accomplish this by installing two trim pieces on each wall.
- 4. When installing the trim, make sure you use the measurement you made note of to know how far into the trim piece you should nail. This is to ensure that you are nailing the trim down into the actual wall.
-
On most Wallplank sku's there can be some pattern repeat in about every 16th board.
-
No, Wallplanks have not been tested to be sound proof. Wallplanks are acoustic dampening if an item were to hit the wall, similar to high heels on a hardwood floor, but no further testing or information is available regarding soundproofing.
-
The tongue side of the board has a protruding ridge and the other side has a groove that the tongue fits into. When putting up the boards it doesn’t matter which side is up as long as the boards are consistent throughout the entire installation.
-
You want to start where it is level. There are multiple ways you can establish your starting line. The most important aspect of establishing your starting line is to ensure that the first row of planks you install is 100% level. If your baseboard and ceiling are level, you can use one or the other to establish your starting line. If neither your baseboard or ceiling are level, you will need to establish a level line across the wall. With the use of a pencil and a 4' level, you can establish a starting line across your wall at eye level. DO NOT adhere the plank until you have it placed in the right position. Once the material is adhered to the wall it will be very difficult to reposition.
-
Vacuubond does not have a vapor barrier but we can sell a membrane primer which does if need be.
-
- 1. This product is far more durable and is even slightly flexible due to the fact that it is engineered. Those planks won't break easily.
- 2. The VaccuBond pre-applied adhesive is far more advanced and successful than peel and stick 3M tape and it takes less installation time to remove one single piece of release paper compared to 3 strips for tape. (https://vacuubond.com/)
- 3. This product is engineered in such a way that you will not need to worry about expansion or contraction with the shiplap edge profile.
- 4. No painting required! There are no holes in the planks so you do not have to paint the underlying wall prior to installation or use a touch up marker during installation.
- 5. The surface is smooth and easy to clean.
- 6. This product is UV cured which is a very effective cleaning procedure along with the fact that it prevents the product from fading, stains and wear.
- 7. 100% environmentally friendly and made in the USA.
-
Yes, Wallplank Originals unfinished SKU's like Unfinished White Oak, Unfinished Walnut or Unfinished Maple can be painted or stained. All other Wallplank Original colors are pre-finished and cannot be painted.
-
No, our Reclaimed Wallplanks are pre-finished and cannot be painted. We offer 3 Wallplank Originals SKU's that are unfinished and can be painted. The unfinished SKU's are Unfinished White Oak, Unfinished Walnut and Unfinished Maple.
-
No, our Dimensions Wallplanks are pre-finished and cannot be painted. We offer 3 Wallplank Originals SKU's that are unfinished and can be painted. The unfinished SKU's are Unfinished White Oak, Unfinished Walnut and Unfinished Maple.
-
Yes, our Classic Shiplap Wallplanks are paintable (regular interior paint will work). We also offer 3 Wallplank Originals SKU's that are unfinished and can be painted. The unfinished SKU's are Unfinished White Oak, Unfinished Walnut and Unfinished Maple.
-
Our raw materials are sourced throughout the USA and the final product is finished in Wisconsin.
Shipping Policy
All orders over $100 ship for free to the continental US. Other shipping rates will be confirmed and applied automatically at checkout. All rates are based on regular ground shipping. If you need a rush order (expedited shipping), or would like an estimate on a potential order please CONTACT US
If you need to expedite an order there may be an additional fee associated with expediting. When expediting an order, please call us so we can do our best to accommodate.
We cannot ship to P.O Boxes. Please provide a valid postal address during checkout
We can ship to all states including Alaska & Hawaii, as well as other countries. CONTACT US for shipping rates
Return Policy
It's important to us that you're happy with your Wallplank purchase, and we will back that up with our return policies. If you're not totally satisfied with your purchase you can return it within thirty (30) days, with the exception of our Wallplank sample orders, limited edition items, J-roller, and wood wall cleaner. While we hope it doesn't come to this, we'll make it as painless as possible by providing UPS return shipping labels and issuing a refund by the same method as your original payment. Refunds that are issued will be for the returned material minus the total shipping costs and a 10% restocking fee.
Please review our full Return Policy.