Your Cart is Empty


A Step-by-Step Guide to Installing Wall Planks in Your Home

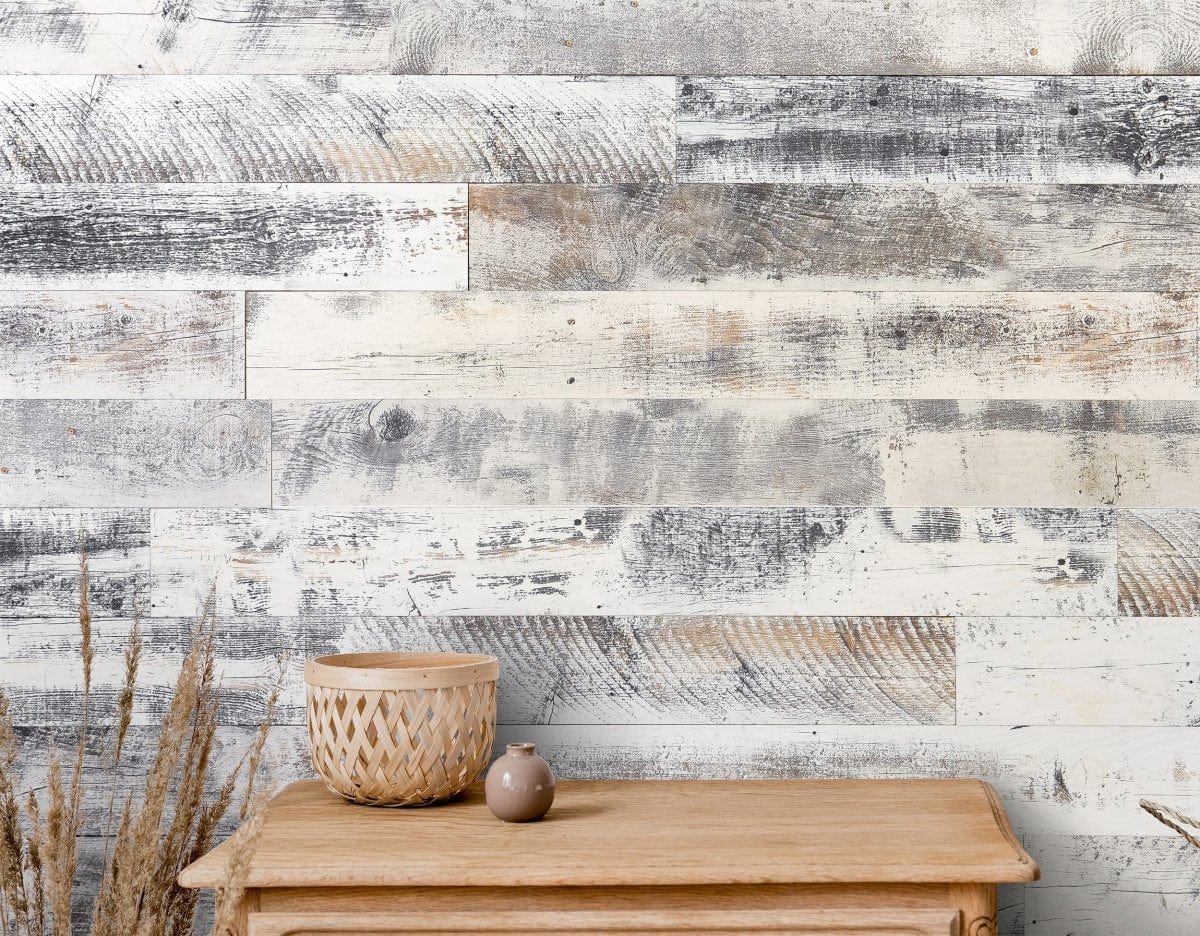
Adding wall planks to your home is an excellent way to elevate your interior space with warmth, character, and texture. Whether you're aiming for a rustic farmhouse aesthetic or a sleek, modern design, wall planks provide a versatile and durable solution. Best of all, with the right tools and techniques, you can achieve professional results with a straightforward installation process.
Why Choose Wall Planks?
Before diving into installation, it's essential to understand why wall planks are an outstanding choice for homeowners:
-
Aesthetic Appeal: Wall planks add visual interest and a timeless appeal to any room.
-
Durability: High-quality planks are designed to last, resisting wear and tear over time.
-
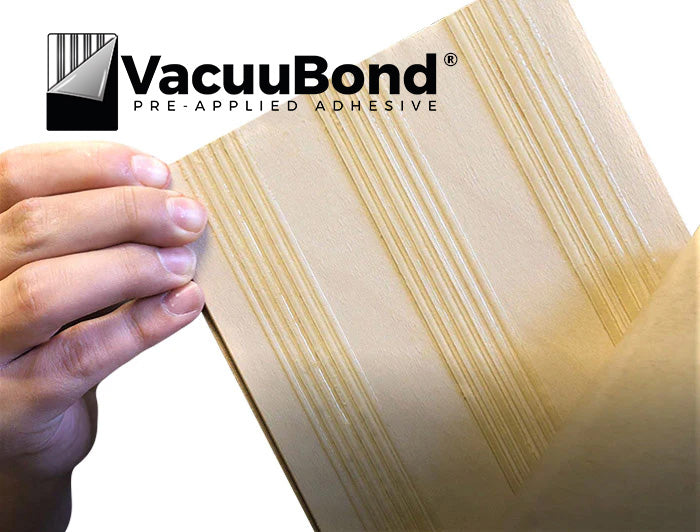
Easy Installation: Many wall plank products, such as those from Wallplanks, feature self-adhesive backing, making the process simple and hassle-free.
-
Versatile Design Options: Available in various wood species, colors, and finishes, wall planks can complement any home style.
Now that you understand the benefits, let's explore the step-by-step process of installing wall planks.
Step 1: Gather Your Materials
To ensure a smooth installation, start by collecting the necessary tools and materials:
-
Wall planks (ensure you purchase enough to cover the desired area)
-
Tape measure
-
Level
-
Pencil or chalk line
-
Stud finder
-
Utility knife or saw (depending on plank material)
-
Adhesive (if planks are not self-adhesive)
-
Finishing nails or brad nailer (optional for extra reinforcement)
-
Spacers (for uniform plank spacing)
-
Damp cloth (for surface cleaning)
Step 2: Prepare Your Wall
A properly prepped wall is crucial for a successful installation. Follow these steps:
-
Clean the Surface: Wipe down the wall with a damp cloth to remove dust, dirt, and grease.
-
Check for Imperfections: Repair any cracks, holes, or bumps that could affect adhesion.
-
Find and Mark Studs: Use a stud finder to locate wall studs and mark them with a pencil. This will help with plank placement and reinforcement.
-
Measure and Mark a Level Line: Using a level and chalk line, mark a straight line where you will start your first row of planks. This ensures a level installation and prevents misalignment.
Step 3: Plan Your Layout
Before adhering planks to the wall, plan your layout:
-
Decide on Orientation: Planks can be installed horizontally, vertically, or in a herringbone pattern.
-
Dry Fit the Planks: Lay the planks out on the floor to visualize the arrangement.
-
Stagger the Seams: Avoid aligning seams in consecutive rows to create a natural, visually appealing design.
-
Cut Planks as Needed: Use a utility knife or saw to trim planks to fit your design.
Step 4: Install the First Row
The first row sets the foundation for the rest of the installation. Follow these steps carefully:
-
Peel and Stick (if applicable): If using self-adhesive wall planks from Wallplanks, remove the backing and press the plank firmly onto the wall.
-
Apply Additional Adhesive (if needed): For extra durability, apply construction adhesive to the back of each plank before attaching it.
-
Secure with Nails (Optional): While not always necessary, brad nails or finishing nails can add extra support, especially for heavier planks.
-
Check for Level: As you go, use a level to ensure that each plank is straight and properly aligned.
Step 5: Continue Installing Planks
Once the first row is secure, continue installing the remaining planks:
-
Work Row by Row: Follow your planned layout, ensuring each plank fits snugly against the previous one.
-
Press Firmly: If using self-adhesive planks, press each plank firmly into place for strong adhesion.
-
Trim as Needed: Cut planks to fit corners, outlets, and edges to maintain a seamless appearance.
-
Maintain a Staggered Pattern: Avoid creating repetitive patterns to achieve a more organic look.
Step 6: Finishing Touches
After installing all planks, complete the project with these finishing touches:
-
Seal Gaps (if necessary): Use caulk or wood filler to fill small gaps for a polished finish.
-
Touch Up Edges: If needed, use paint or stain to match exposed edges with the planks.
-
Clean the Surface: Wipe down the planks with a dry cloth to remove dust and fingerprints.
Maintenance and Care
Proper maintenance ensures your wall planks remain in top condition for years to come:
-
Dust Regularly: Use a dry microfiber cloth to remove dust and dirt.
-
Avoid Excess Moisture: While most planks are moisture-resistant, avoid excessive exposure to water.
-
Inspect for Loose Planks: If any planks start to lift, apply additional adhesive to secure them.
-
Repaint or Refinish as Needed: Over time, you may wish to refresh the planks with a new finish or stain.
Transform Your Home with Wallplanks
Installing wall panels is a rewarding DIY project that adds beauty and personality to any space. Whether you want to enhance your living room, bedroom, or office, Wallplanks provides high-quality, durable, and easy-to-install products that make the process seamless.
At Wallplanks, we take pride in offering premium wall plank solutions sourced from North America and manufactured by our parent company, From the Forest, LLC. Our commitment to quality ensures that every plank meets the highest standards of durability and aesthetics.
Ready to elevate your home with stunning wall planks? Explore our collection and start your transformation today!